
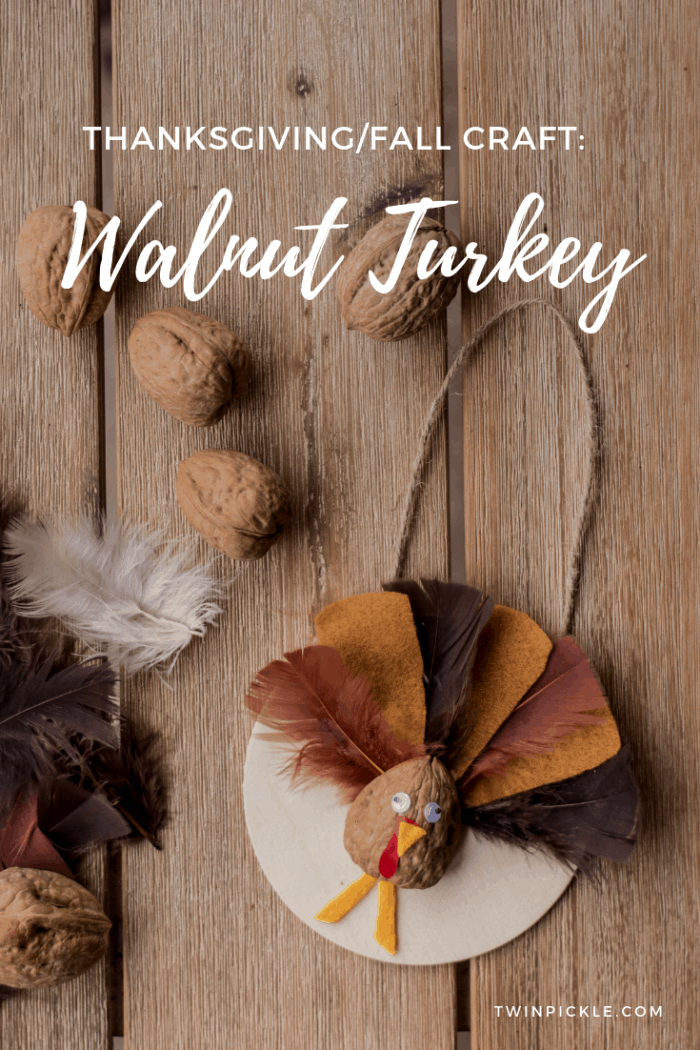
This simple Thanksgiving walnut turkey craft is cute, easy, and you get to snack while you do it… bonus! The cracking of the nuts themselves is fun for kids and triggers all the Holiday vides. Between the natural nutshell, the feathers and the wood backing, this Fall craft has an outdoorsy rustic feel. I think it turned out great!
*This post contains affiliate links. This means I may get a commission if you decide to purchase one of the products I link to. For more information, read my Privacy Policy*
Is it too early for Thanksgiving crafts? I know I’m supposed to be knee deep in Halloween costumes but hey, there’s always time for a little turkey crafting. Plus, the Christmas decorations were on the shelves in Nordstrom the other day so I say get moving on Thanksgiving so you have time for Christmas crafts, ha!
Thanksgiving Walnut Turkey Craft Materials
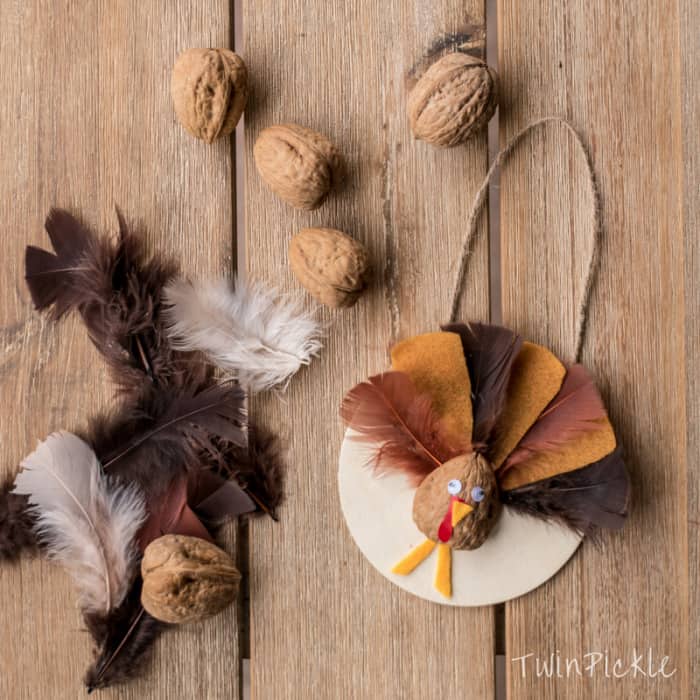
I used two different shades of yellow felt, a darker mustard shade for the tail and a brighter shade for the beak and legs. I used red paper for the turkey snood because it’s easier to cut a delicate shape. The feathers were bought in a mixed bag of fall colors. We have plenty left so we’ll have to come up with some more Fall crafts! While you could make your own backing plate, the readymade one I used only cost $1.50 from Michaels (+ I had a coupon!) so I couldn’t resist.
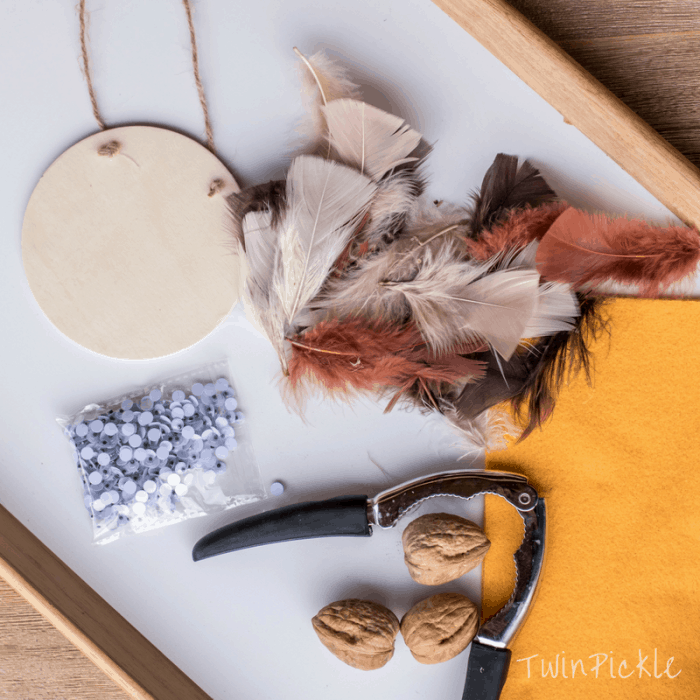
Materials:
- Walnuts
- Wooden Circle Hanging Board
- Yellow Felt
- Feathers
- Googly Eyes
- Red Paper
- Glue
Thanksgiving Walnut Turkey Craft Method
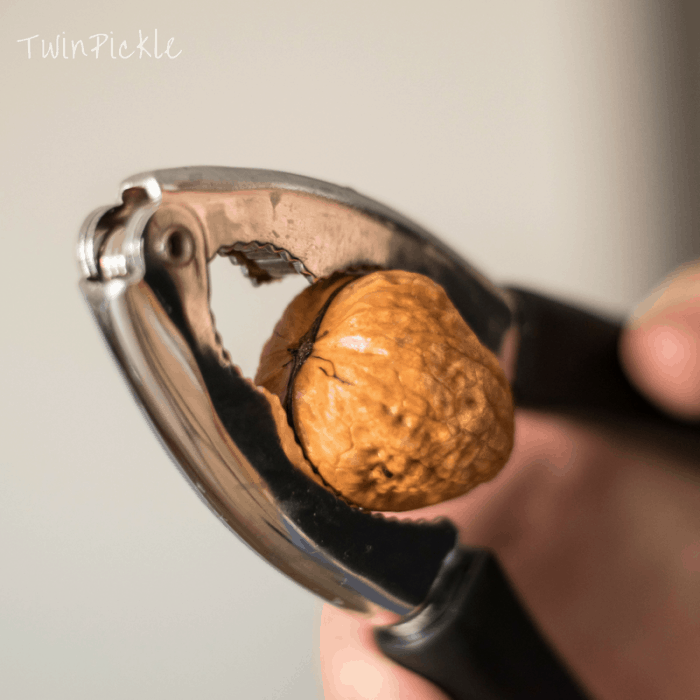
The most difficult part of this craft is cracking the walnut! It’s quite challenging to crack the shell without destroying it. But don’t worry, there is a trick to it… soak the walnut in warm water for 30mins and you should be good to go. Use the nutcracker to crack just one side on the nut and the softened shell should crush and break away from the other side.
I used a general purpose craft glue, good for fabric, wood etc. Cut three feather shapes from your dark yellow felt and find three darker feathers from the pack that match in size. You want your feathers to be large enough to run from the center of the plaque to beyond the edge.

Alternating felt and features, glue your tail in a fan shape to the wooden backing plaque. Glue your Walnut shell to the center of the plaque, hiding the meeting point of the feathers. Wait until your walnut shell is dry from soaking to glue.
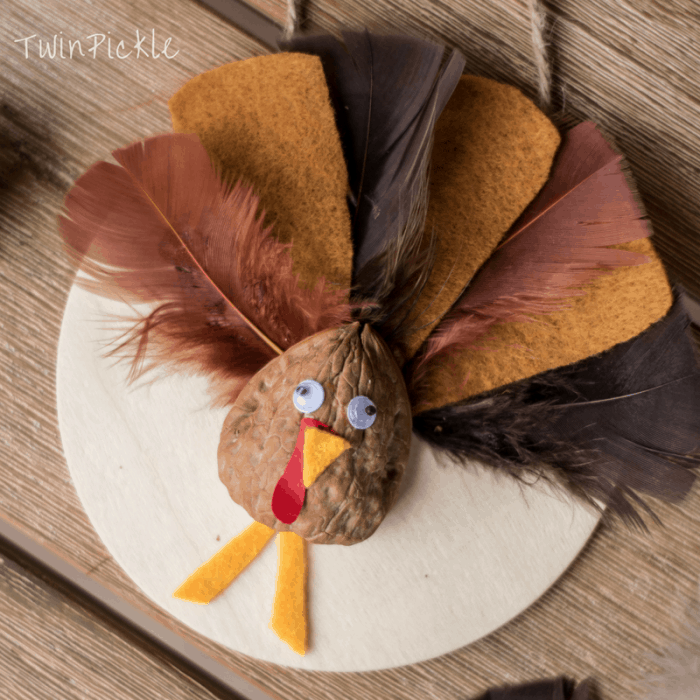
Add googly eyes, a red paper snood, a felt beak and legs and ta-da… simple! Allow your turkey time to dry before hanging. This Thanksgiving walnut turkey craft will make the perfect Fall decoration for a kids door.
In totally unrelated but important news, we have one Twin potty trained, hooray! The other is not really on board though so we’re not out of the woods yet. And if you missed it, don’t forget to check out our DIY Kawaii bookmark corners!
7 responses to “Simple Hanging Thanksgiving Walnut Turkey Craft”
This is so adorable! What a cute little idea to make for a Thanksgiving Craft! I absolutely love it.
Thanks! It was a fun little project!
How cute is this???? Such a simple, fun and awesome craft the kids would love to make! Perfect for them to show members of the family what they created, when they get together as a family on Thanksgiving.
Exactly, who doesn’t love a bit of holiday crafting?!
What a cute Thanksgiving craft! I love it! We have walnuts here so I may have to make a few of that.
Thanks! We have since made quite the collection although I let the kids lose with the feathers and I’m not sure they all look like turkeys ??
[…] Simple Hanging Thanksgiving Walnut Turkey Craft by Twin Pickle […]