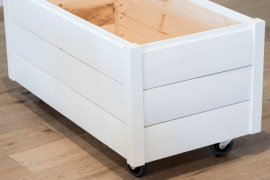
When it comes to DIY furniture, something simple like a box is a good place to start. I created this DIY toy box with shiplap because as a nation we haven’t quite had enough of that farmhouse charm. Fixer Upper is still on loop via HGTV and we’re still loving all the shiplap action. This is my first time working with it and I’m really pleased with the result.
** This post contains affiliate links. As an Amazon Associate I earn from qualifying purchases **
I’ve been browsing toy boxes for a while but the ones I like are always expensive and I wanted something a little more charming than a cheap IKEA container. I don’t like lids on toy boxes either, they’re a finger trap and that narrowed my choice further. I decided it had been far too long since I got my tools out and came up with this DIY toy box with shiplap instead. I love working with wood and if you fancy another little project, check out the hexagon shelves I built for the Twins.

What you Need to Build a DIY Toy Box with Shiplap
Although the dimensions below should work for you, I would measure as you go to make sure everything is a snug fit. The corner posts should be cut to the height of three shiplap boards put together, so lay them on the ground and check the height of your connected boards. Then wait until your corner posts are fixed in place to measure the exact lengths of shiplap required to fill the gap.
Materials:
- 1/4″ plywood base cut to 17″ x 33″
- 6 lengths of 1″x 6″ shiplap, 31½” long
- 6 lengths of 1″ x 6″ shiplap, 15½” long
- 4 lengths of 2″ x 2″ softwood, 14¼” long
- 4 castors, 3″
- 4 screws for fixing corner posts/base
- 48 screws for fixing boards
- 16 bolts, washers, nuts, 1/4″ for fixing castors
- Paint and sandpaper (optional)
NOTE: Nominal size 2×2 softwood posts are labeled 2×2 but actually measure 1½” x 1½”. This is a perfect size so don’t panic when you get them home and measure!
Tools:
- Kreg Jig for fixing boards from the inside,
- Hacksaw, chisel, hammer for notching corner posts,
- Drill with 1/4″ bit and screwdriver,
- Spanners for fixing 1/4″ bolts.
- Paintbrushes (optional)
It took a while to decide how to use the shiplap, mainly because of the corner junctions. When you’re not dealing with a squared profile, corners get tricky. I decided to make the most of the bottom lip of the shiplap and use it to sit on top of the baseplate. This detail is really neat but it did mean I had to notch the corner posts to do the same.
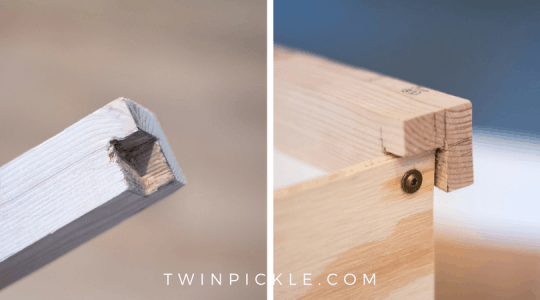
Measure the bottom lip on your shiplap. It’s likely ½”. Notch this depth out of the corner of your corner posts, leaving a ¾” thick L-shape that will wrap around the baseboard. This is the most difficult part of the build because you’ll need to use a chisel and some old school carpentry skills. I used a hacksaw to cut in as much as I could and then chipped away with a chisel to create the notch. It does not need to be perfect, you won’t see it after all. Mine was pretty rustic!
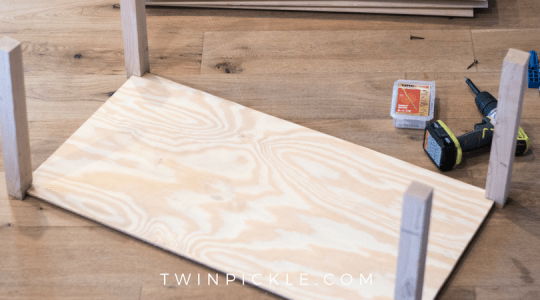
Screw your corner posts from the underside of the base. All four corner posts should be fixed in place before measuring the space between them. This should be 31½” for the long sides and 15½” for the short sides but check and cut your shiplap to size accordingly. If your notch size isn’t perfect your board size will adjust and no one will ever know!
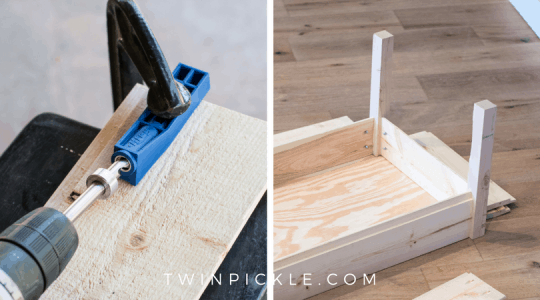
This project was really just an excuse to buy a Kreg Jig. I’ve been meaning to try it for ages! Fix the Kreg jig in place according to the instructions and it will guide you to drill pilot holes at the perfect angle to fix your shiplap boards from the inside to your corner posts. The boards are not deep enough to be able to bury the screw head but I personally don’t mind the look of the exposed screw heads and bolts on the inside of the box.
Fix your boards in layers, until they are all in place. Take it slow with the screws, it’s easy to over tighten and crack the wood. Standard shiplap boards are not a high-grade wood made for cabinetry and you have to be a little forgiving when working with something this rustic.
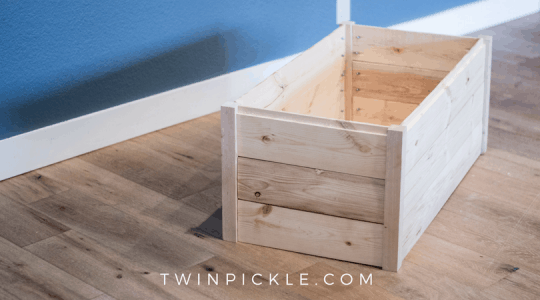
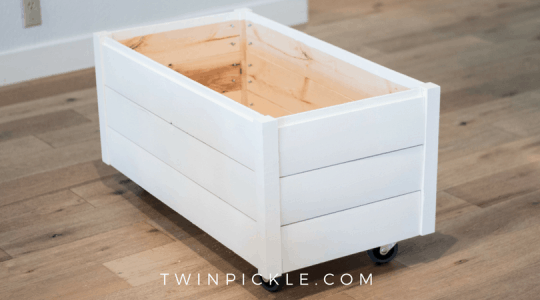
Once all your boards are in place, your box is almost complete. I chose to paint mine to match the other furniture in my daughter’s room but you may prefer to stain or leave as is.
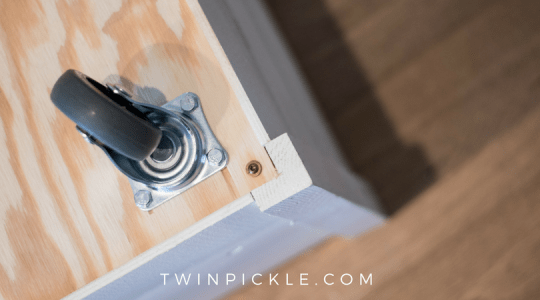
The final step is to fix the castors to the base. Mark and drill 1/4″ holes and bolt through from the underside. My castors didn’t allow space around the holes to fit washers so I have the washers and nuts exposed inside the box. A different style of castor may allow fixing from the other side for a neater finish.
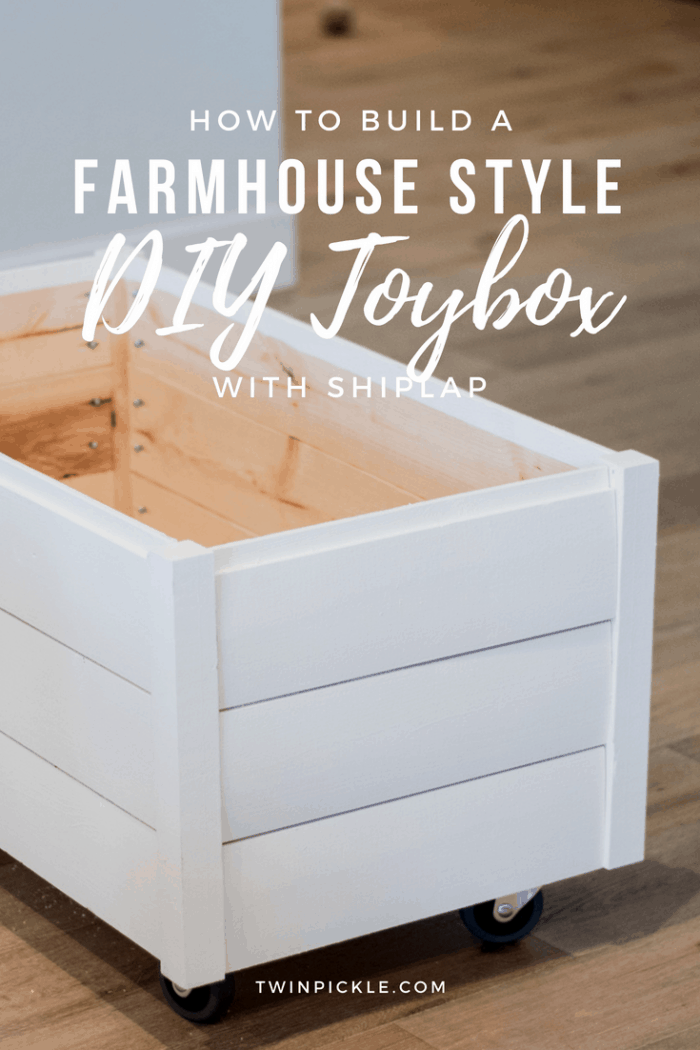
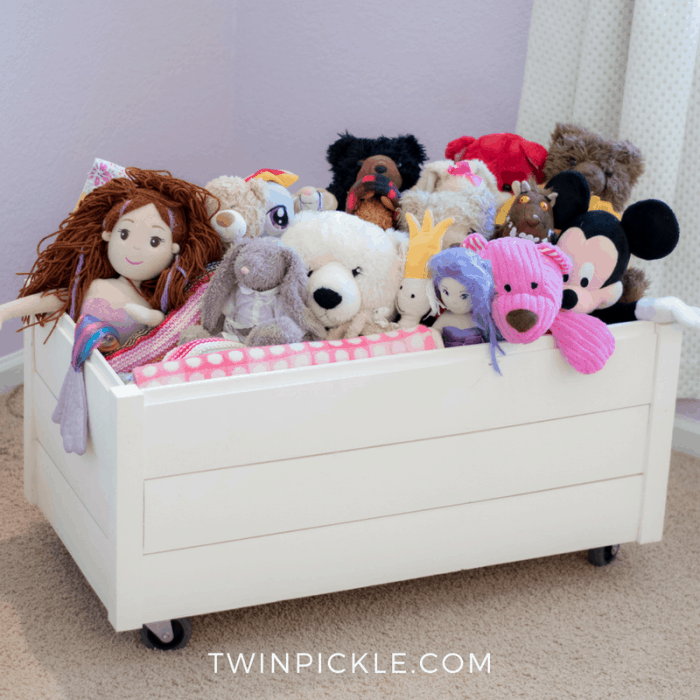
Your farmhouse style DIY toy box with shiplap is now complete! You could also add rope handles or cut-outs to either if you want to add a little detail.
Elsie had fun getting all her soft toys and blankets into the box. The box it replaced broke some time ago so this project has been a long time coming!
I hope these instructions are clear and help you build your own farmhouse style DIY toy box with shiplap. If you run into any problems and you think I need to tweak something, do let me know. Don’t forget to pin it so others can join in on the DIY toybox fun…

3 responses to “How to Build a Farmhouse Style DIY Toy Box with Shiplap”
You did an amazing job. I just love this farmhouse style DIY toy box with shiplap. Thanks a lot for sharing this tutorial.
[…] DIY Shiplapped Toybox by […]
[…] Made from ¼″ plywood and lengths of 1 “x 6″ shiplap, 2″ x 2” softwood, 4 castors, paint and sandpaper – it’s easy to move around and store all those toys! Plus, it looks great with its farmhouse-style design that will fit any room. Make something special for your family today by crafting this beautiful toy box! twinpickle […]